The 4-1-1

So....you volunteered. Now what? You search the web aimlessly...okay, frantically, for that perfect something to show your child (and the world) how special they are. Send in ordinary cupcakes- out of the question. Store bought - never! But, you also don't want to repeat what the last mother did...no matter how fantastic.

You have just entered the mind-set of the "ROCKSTAR" parent.

Pretty soon, mothers and fathers will be saying "How did you do that?" and "That's so cool!" or "Mmmmm, delicious! I MUST have the recipe!" Before you know it, you will be called upon so regulary for contribution that you will almost hear the crowd cheering and see your name in lights!

That's exactly what my road to stardom was like. But, it didn't end at kid functions. Nope. My family and friends noticed the extra-special attention I gave to gatherings. Whether it was a weekend at the lake or Thanksgiving dinner, there was always something extraordinary to make my loved ones feel exactly that~ loved. So, my input is regularly given and I love it!

Within this blog you will hear just about everything; including successes AND failures. (Afterall, you don't have to be perfect to ROCK!!) Favorite recipes, party ideas, ways to save time and $$$ - you name it. A lot of things are pulled from the Ultimate Resource Guide (aka "the www"); but, others are my own tricks. The beauty is that it's all right here.

Are you ready to ROCK??


Search This Blog

Sunday, October 10, 2010

Harvest Party Time

It's Harvest (aka Halloween) Party time!  Are you tired of the same old cut-out cookie recipes and bobbing for apples?  Sometimes we ROCKSTARS like to sing a different tune.  My idle fingers hit the internet in search of some cute, ROCKIN' harvest ideas and here's what I found:

Owl sugar cookies.  Super cute and kid's can help decorate. 'Nuff said.  
Find them at http://www.cheekykitchen.com/2010/09/owl-sugar-cookies.html


Scarecrow Cookies.  Again, super cute and the kids can help decorate.  Whether you put them on a stick or not, these are anything but scarey :)  Cut time by using a bagged sugar cookie mix and pre-made icing.
http://www.skiptomylou.org/2008/10/07/more-bake-sale-goodies/


OMGosh! How great are these?  They may not go over so well for a school-function, but these will surely be on my table!  I love these.  Make them your own by pulling out your gingerbread man cookie-cutter early this year, or whip them out in a snap using pre-make gingerbread cookies and frosting.
http://rootsandwingsco.blogspot.com/2009/10/adorable-gingerbread-skeleton-cookies.html

No fall party is complete with out candy corn.  Why not make it a cookie? These are a lot easier than they look.  http://www.bettycrocker.com/recipes/candy-corn-cookies/2c40f5fa-fdb9-4236-b896-4097bfd1af36

Game Time

There are so many great games to play with kids during the fall.  Here are a few that caught my attention:

Needle in a Haystack.   Fill an inflatable/plastic kiddie pool with hay.  Mix in little toys (i.e. spider rings) and let the kids go crazy looking for their prizes.

Ring the Pumpkin.  Don't put away those dive rings yet.  Line up several pumpkins with long stems or miniature pumpkins.  Let the kids ring them for points or prizes!

Pin the Nose on the Pumpkin.   Switch out the donkey for Fall's favorite gourd and you have a hit!  You can customize this by using a witch and broom, skeleton and bone, turkey and feather, etc.

Gourd Race.  Using gourds and brooms (or rakes), create a starting line and finish line.  The first one to broom their gourd past the finish line wins.  Since the gourds are not perfectly round, they will not roll straight, so it will be fun to watch the kids case down their gourds!

Thursday, October 7, 2010

Lunch Lady Land

We have all been super busy with back-to-school: PTO, fundraisers, supply shopping, etc.  Since my oldest had 1/2 day kindergarten last year, First grade means more than bus rides, homework, and a larger bookbag; it means school lunch. 

It took me less than a week to figure out I needed a plan when it came to lunch.  Being a new SAHM, $2.25 was not going to happen on a daily basis.  (I don't know about you, but the more money I save means the longer I get to stay home with my kids.  It's all about job security!)  This is what I learned the first week.  1) Don't ever ask the open ended question: "What do you want to pack for lunch?"  without having your cupboards stocked with every food imaginable.   And, 2)  If you ask that question be prepared to hear a string of junky, sugary snacks come out of your child's mouth.

Here's my solution.


I made 4 columns
  • Main
  • Fruit
  • Veggie
  • Dessert
I sat down with Allie and we talked about her favorite things for lunch. Under each column, we listed 5 selections.  For example, under "Main" the choices are PB&J, Meat/Cheese/Crackers, Bologna Sandwich, Boiled Eggs, or Bagel and Cream Cheese.

Each evening she selects one item from each column and we pack her lunch, so it's ready to go the next morning. 

This is really a simple concept, but it saves time, money, and energy!  ROCK on!

Chocolate Cupcake Toppers

Better late than never! My schedule as a SAHM is anything but dull.  I have been super busy with birthdays, back-to-school and just finding my groove.  Hopefully this post gives you more reasons to ROCK!

Emily recently turned 3 with a Dora birthday celebration.  If you have spent anytime at all watching Nickolodeon, you saw their idea for Dora cupcakes.  Being that I love cupcakes and Emily loves Dora, we just had to include them in her party!  You can find the directions here: http://www.nickjr.com/recipes/dora-cupcakes.jhtml

But who is Dora without Boots. So, I searched "Boots coloring pages" in Google images and found a picture with his head about the same size as Dora's.  I used black food coloring and white chocolate to make him gray and pink food coloring to fill in his ears.   Then, it hit me.  Why don't I use this technique to make custom cupcake toppers that are as delicious as they are decorative?

Here's what you need:

  • Melting chocolate : I used white and chocolate almond bark from my local grocery, but you can also buy it pre-colored by Wilton.  The pre-colored is sold at many local retailers, including Wal-mart or Jo-Ann's.
  • Food coloring
  • Wax paper
  • Heavy duty zip-lock bags or pastery bags
  • Tooth picks
  • Print out of the image of your choice
Begin by locating your design.  The best way to do this is type in your subject as a coloring page and search google images.  For example, I searched "ghost coloring page" and "bat coloring page".  I added the word coloring page, so it would give me nice, simple, one-diminsional images.  Since we are nearing Halloween, I am going to be making ghosts and bats.  Try to locate pictures that are approximately the size of your cupcake top.  So, if you are making mini's be sure to select a smaller size.


First, lay your wax paper over your print out.


Melt your chocolate in the microwave according to package directions.  Fill your bag.  Cut the tip off the corner of the zip-lock baggie or end of your pastery bag to create a small opening.  You don't want the opening very large at all, or the chocolate will come pouring out.  Twist the top of the bag or secure with a rubber band.


Second,  trace the outline of the image and fill it in most of the way.

Next, take a tooth pick and spread the chocolate in the center around to fill up the entire image.


Continue sliding your image underneath the wax paper until you have created enough images for your cupcakes.  Since you are working with chocolate, I would encourage you to make a few extra in case some get broken (or eaten!) 

Once the images have dried, you can add detail with another layer of chocolate (like I added pink chocolate to Boot's ears).  Or with food coloring, as I am planning on adding a mouth and eyes to the ghost.

The chocolate cupcake toppers can be made several days ahead of time and stored in an airtight containter.  I would keep them on the wax paper while storing. 

Also, be careful when removing the images from the wax paper.  Try to pull the paper away from the image and NOT the image away from the paper. 

I think these would be cute around the edges of a cake, too. 

Monday, July 26, 2010

Talk about S'mores....

Campfire Giant Roasters Marshmallows Huge 28 Ounce Bag Pack of 3I know...this is my second post on S'mores; but, in my defense, it is campfire season.  I'll keep this short and sweet...very sweet.  I found these ROCKSTAR marshmallows while shopping for things to take on our road trip and I HAD to buy them!  They are huge!  Each marshmallow is about twice the size of your normal marshmallow.... Hello, ROCKSTAR! 

I was excited to know that I could purchase these mondo-marshmallows on-line through Amazon.com.  You can bet that on our next trip to the lake these will be packed! 

This is a perfect example of taking the ordinary and making it extraordinary!  Taking you from parent to ROCKSTAR! 

Friday, July 16, 2010

I want S'more cupcakes!

I think the secret to being a ROCKSTAR is simple: take the ordinary and make it extraordinary!  You don't have to reinvent the wheel...just make the rim shine!  Better yet, put on some "spinners" and bump the bass!

When I go looking for a recipe, I try to find a classic with a twist.  Which is why, when I came across this recipe on MarthaStewart.com  I had to try it!  She calls is "Chocolate Graham Cracker Cupcake with Toasted Marshmallow Frosting", but let's call a spade a spade...it's a S'MORE CUPCAKE!  According to Martha's site, the recipe is courtesy of Jennifer Shea at Trophy Cupcakes.

You can simplify the cake part of the recipe by using my trick: a box of chocolate cake mix and a box of chocolate pudding. Mix the boxed cake as directed, adding in the powdered pudding.  (Although, I will admit that I went the "long way" and followed the instructions listed below.)

S'MORE CUPCAKE
(Makes 2 dozen)

2 1/4 cups plus 2 tablespoons sugar

1 3/4 cups all-purpose flour

3/4 cup plus 1 tablespoon cocoa powder (not Dutch-processed)

1 1/2 teaspoons baking powder

1 1/2 teaspoons baking soda

1 teaspoon salt

2 large eggs

1 cup whole milk

1/2 cup vegetable oil

2 teaspoons pure vanilla extract

1 cup boiling water

1 1/2 cups graham cracker crumbs (from about 20 squares)

1/3 cup unsalted butter, melted

9 ounces bittersweet chocolate, finely chopped

Directions

Preheat oven to 350 degrees. Line 2 standard muffin tins with cupcake liners; set aside.

Sift 2 cups plus 2 tablespoons sugar, flour, cocoa powder, baking powder, baking soda, and salt together into the bowl of an electric mixer. Using the paddle attachment, mix ingredients together on low speed.

In a large bowl, mix together eggs, milk, oil, and vanilla. Add to flour mixture and beat on medium speed for 30 seconds. Scrape down sides of bowl and continue mixing on medium speed for 2 minutes. Add boiling water and stir to combine; set cake batter aside.

Place graham cracker crumbs, remaining 1/4 cup sugar, and melted butter in a large bowl; stir until well combined.

Place 1 tablespoon graham cracker mixture into the bottom of each prepared muffin cup. Use the bottom of a small glass to pack crumbs into the bottom of each cupcake liner. Reserve remaining graham cracker mixture for topping.

Place 2 teaspoons chocolate in each muffin cup. Transfer muffin tins to oven and bake until the edges of the graham cracker mixture is golden, about 5 minutes. Remove from oven and fill each muffin cup three-quarters full with cake batter. Sprinkle each with remaining chocolate and graham cracker mixture. Return to oven and bake, rotating pans halfway through baking, until tops are firm and a cake tester inserted in the center comes out clean, 18 to 20 minutes. Transfer muffin tins to a wire rack and let cupcakes cool in pan for 10 minutes. Remove cupcakes from pan and let cool completely.


MARSHMALLOW FROSTING   
(Makes enough for 2 dozen cupcakes)

8 large egg whites

2 cups sugar

1/2 teaspoon cream of tartar

2 teaspoons pure vanilla extract

Directions

Place egg whites, sugar, and cream of tartar in the heatproof bowl of an electric mixer. Set over a saucepan with simmering water. Whisk constantly until sugar is dissolved and whites are warm to the touch, 3 to 4 minutes.

Transfer bowl to electric mixer fitted with the whisk attachment, and beat, starting on low speed, gradually increasing to high, until stiff, glossy peaks form, 5 to 7 minutes. Add vanilla, and mix until combined. Use immediately.

Transfer frosting to a large pastry bag fitted with a large plain round or French tip (such as Ateco #867 or Ateco #809). Pipe frosting in a spiral motion on each cupcake. Transfer cupcakes to a baking sheet. Using a kitchen torch, lightly brown the frosting, taking care not to burn the cupcake liners. Serve immediately or store in an airtight container, up to 2 days.

From The Martha Stewart Show

As you see, I did not pipe my frosting on. I used an off-set spatula.  I DID use our "kitchen torch" (aka candle lighter/grill lighter/fire pit starter), which was so much fun!  Make sure you don't get too close to the frosting or leave the flame in one spot too long, or your frosting will be flaming!

Consider this: The next time your child has a sleepover, have a camping theme.  Set up some tents, have hot dogs and baked beans, tell ghost stories and make these for desert! 

ROCK ON!

Wednesday, July 7, 2010

Travelling Show

Summer means it's time for a break from the daily routine. Whether that means travelling or enjoying a "stay-cation", we all deserve it.  This year, I am driving 18 hours to spend a couple weeks with family.  You read that right, 18 hours with my 6 and 2 year old, in a sedan.  (Let's just say that not all ROCKSTARS are comfortable jet-setting!) 

Being the list-maker, planner, ROCKSTAR that I am; I have scoured the internet looking for fun ways to keep my children entertained (and my sanity in tact)!  Not the normal : DVD player, crayons, hand-held game system, or MP3 player.  Afterall, if the trip is longer than an hour, my car is usually packed with any combination of these.  I wanted something new (at least, new to me...)

I learned a few tricks that I think will work and have some hits of my own that I will share. I also came across some wonderful sites:

Before you go: Prepare your kids for the length of trip.  Let them know you will be travelling during the night.  Talk about some of the things they will see and the games you will play.  Let them pick out some of their favorite things.  I have a bag for each of my kids and they are limited to what they can fit in the bag.  Remind them about safety and strangers. 

Here are some of the fun games I'm going to try:

1.  Colorforms.  Kids can create pictures on their side windows.  Amazon offers several sets, including a road trip one that looks really cute.  The price ranges from $3-$10.

2.  Travel Bingo.  Momsminivan.com offers a couple free printables.  Or, make your own using the spreadsheet program on your computer.  Just make your columns, insert clip-art of the items you want to find and print it out.  (Just remember: each player's card must vary slightly, otherwise, everyone in your car will hit "BINGO" at the same time!)  Laminate the cards and pack some dry erase markers, so the cards can be re-used.

3.  Brown Bag Puppets.  I like this because, it has many uses.  The bags can be folded flat for storage and are cheap.  Your child can decorate the bag, create a story, and make as many as they want!  In a pinch, the bag can be used if your child gets carsick, for a trash sack, and they are completely recycleable. 

Kids Map of the United States: Fun Things to See and Do4.  Word Play.  Have your child write down words that they see (on billboards, semi-trucks, signs, etc.)  Once they get a certain amount, have your child write/ recite a story using all the words.

5.  Scavenger Hunt.  Create a list before you leave of items you think you will see along your journey.  If you have an older child, challenge them to get a photo of each item.  Whoever completes their list first wins!

6.  Give them a map.  I found a great one from Rand McNally that lists fun things to do along the way, too.  I'm a huge supporter of taking quality stops with my kids while on a long trip, so this helps both of us!

7. Treasure Bottle.  You will  have to do some planning for this one.  Use a bottle with a lid (i.e. 2 liter bottle or water bottle) Fill it 2/3 with rice.  Add small treasures from your house (legos, paper clips, pennies, bolts, Polly Pocket stuff, Barbie shoes, etc.)  Keep count and a list of the items you place in the bottle.  Secure the lid (I suggest using duct tape.  I don't know about you, but I'm not up for cleaning cups of rice from my car.)  The child rolls the bottle around until they have located all of the items in the bottle. 

8.  Blow Bubbles.  Yep.  Take a small bottle of bubbles and have your co-pilot blow bubbles back to your kids, so they can pop them.  Get creative and see if you can blow bubbles using your A/C vent.  If you're up to it, get a couple of those "no-spill" (aka it'll slow it, but my kid ALWAYS finds a way to spill) bubble containers and let your kids have at it. 

9.  Lid Battleship.  It's inevitable that you will stop at a drive thru the way to your destination.  Have the players punch rootbeer, diet, cola, other.  The players take turns guessing someone's "battleship".  The last person with their "battleship" undiscovered wins.  Pop them back up and play again!

10. Secret Prizes.  What fun are games without prizes?  Head to your local dollar store and pick up a variety of toys.  Don't tell your kiddos.  Wrap them up and hide them in your glove box and present the winner of each game with a new trinket.  Or, place them in a dark bag and let the winner choose; but, no peeking!

Don't forget the fail-safe games we used to play as kids, like: I spy, Racecar, Guess Who, the License Plate game, and the various alphabet word/name games.  It's also good to pack a pillow, favorite toy, stickers, and some books.  If you are able, purchase a couple of new books or check some out at your local library, so they are fresh and exciting for your child.  My girls can spend hours playing with magnetic story books.

Be prepared.  I always have: 
  • Disinfectant wipes and papertowels: Readily available
  • Windex and extra paper towels:       In the trunk.  
  • Bottled water:   Several years ago my oldest child got car sick and I happened to have  bottled water in the truck to refill the cooler.  It was warm because it had been in the trunk for several hundred miles in the southern heat.   My child received a nice, warm bath on the side of the road and was good as new.  
  • A bag for trash.  Keeping your vehicle as orderly and clean as possilbe WILL help.  I usually use some old grocery bags or retail bags.  You can also designate a side pocket, just line it with a bag or some paper towel to make clean up easier. 
  • First Aid Kit
  • Emergency Roadside Kit
  • Blanket and Pillow
Health (1-year)As a mother, I learned quickly to never travel anywhere without snacks, and a roadtrip is definitely no exception.   The quality of your snacks should not suffer because you are on vacation.  (Don't get me wrong, I am certainly more forgiving with my children, but you don't have to sacrifice everything!)  Ironically, I recieved my monthly Health magazine that had a very good article entitled "Road Trip! Eat Healthy-Anywhere!"  It listed some of the best (and next best) items you can purchase at the gas station, rest stop, fast food, diner, or pizza/mexican/sandwich chain.  It also gave some helpful hints to packing your snacks.  Here's a summary:

In the cooler:  water, baby carrots, high-fiber, low-cal fruits (think grapes, apples, blueberries), low fat cheese sticks, single-serving hummus, and drinkable yogurt.

Outside the cooler: bananas, trial mix (make your own), granola bars, 100-cal packs of crackers (so, you aren't downing the entire bag of cheese-it's while concentrating on your driving!), and single serve boxes of cereal (grab some from the hotel breakfast).

There are healthy options to satisfy both your sweet and crunch cravings.  Also, try not to pack anything requiring utensils or a lot of napkins (hence the drinkable yogurt).  This only adds to the list of things to remember and let's face it...your car's square footage seems to decrease with every mile during a road trip. 

I would suggest packing snacks in single-serve baggies.  You can pass it back to your kids easily and you aren't left wondering where you are going to store that jumbo size bag.  It also helps with portion control.  Remember, you can always restock your cooler.  If you have room, you may consider keeping a larger cooler in the back to replenish a smaller cooler in the passenger compartment. 

If you are planning on staying at a hotel, there will be either a microwave in your room or you are sure to find one in the lobby.  Pack a couple bags of popcorn, some easy-mac for the kids, or a low-sodium soup to help cut costs.  These will be more filling and healthier than a fatty candy bar, bag of chips, or sugary soda from the snack machine.  Especially, if you are rolling into the hotel at an odd hour. 

TRAVELLING TRAIL MIX

Planters Trail Mix, Energy Mix, 1.5-Ounce Pouches (Pack of 30)• Dried fruit: raisins, dried apricots, date nuggets, banana chips, apple chips, dried papaya, dried cranberries, dried cherries.
• Nuts and seeds: peanuts, almonds, hazelnuts, sunflower seeds, pistachios, cashews 
• Sweet: M&Ms, chocolate chips, white chocolate chips, carob chips, dried coconut, gummy bears
• Salty: Pretzels, sesame sticks, oriental rice crackers, salty "party mix" cereal, rye disks,
• Cereals: Any breakfast cereal, granola.

-Mix equal portions of desired ingredients and store in an air tight container or storage bag.


I hope you all have safe and happy travels! ROCK ON!


Thursday, June 17, 2010

Use Some Thought...Make It Count

In true ROCKSTAR style, I love giving gifts that make people feel important.  I try to take mental notes when I'm talking to someone and when an occasion comes up, I like to present them with something really special.   Special does NOT mean expensive!  Remember, I'm a SAHM and this party has a budget!  It means making specially flavored cupcakes, or buying them a bag of their favorite coffee, or sending a homemade card that makes it on (or before) their birthday.  It means creating a really cool presentation for that gift-card you just picked up for that person who has everything!

I believe that the time you put into a handmade card or really cool wrapping job means just as much as the present itself.  It lets the recipient know that you've really been thinking about them and their special day (no matter how big or small).   One Christmas, I requested my MIL drop off boxes (yes, boxes) of photos she had been keeping since she was dating my FIL.  I organized them chronologically and placed them into albums.  The investment of my time was nothing compared to her enjoyment on Christmas day. 

This brings me to my case-in-point.  I have the cutest niece and nephew.  They are twins and only 4 months older than my youngest.  Unfortunately, with distance and busy schedules, we only get to see them a handful of times each year.  So, when it comes to special days, I really like to ROCK in the gift-giving department.   This year, I thought I would share my gift with you, as well.

A few years ago we got a new computer with Lightscribe technology.  It basically laser images a design directly to your CDs.  Like most new toys, the shinyness wore after after a while and I haven't lightscribed a CD is over a year.  I was dancing around with my kids one day and it dawned on me what I would do for my niece and nephew's birthday.  I was going to make them a CD!

So, I hopped on my iTunes and created a new playlist of all of our favorite kid songs.  Since children's songs are much shorter than standard music, I was able to fit 52 of the most wonderful classic kid's songs onto the CD.   

Next, I Lightscribed the CD with their pictures, a picture of all of the cousin's together, and a photo of my two girls.  As part of the Lightscribe, I wrote "Happy 3rd Birthday" and "Love, Allison & Emily". 

Then, my creative juices really kicked in.  I dusted off some of my scrap booking stuff and went to work on the CD cover.  This is what I came up with:

iTunes is wonderful enough to have the capability of printing a "large playlist" in the exact size for a CD cover.  I printed it on heavy card stock, so it would look more professional. 
I chose red and black for the color scheme, since the CD is for both a boy and girl.  I also like to use classic colors that are fun. 
For the front, I used Microsoft Word, chose a font that I liked and printed it on the same heavy, red card stock.   It reads: "Happy Birthday Beau & Mary-Claire"   and underneath, reads, "A Musical Celebration." 
For the cupcakes, I took a clip-art image and dissected it to make my patterns.  I had a pattern for the: cupcake holder,  cupcake top, candle stick, and flame.  For a total of four.  I chose my coordinated the cupcake liner  with the edging, chose a fun pink for the icing and used a printed paper that reminded me of fire for the flames.   I used adhesive foam squares to bring the cupcake topper off the of paper to give the cupcakes some dimensions.  Since they are turning 3, I used 3 cupcakes.  I took a small brush and made dots of glue and added glitter to the cupcakes, so they would sparkle a bit. 

I hope they enjoy it as much as I did making it!

Tuesday, June 15, 2010

A Day In The Life...

Since my blog is so new, I thought I would give you a glimpse into my ROCKSTAR routine.  Whether we are at home or on the road, one thing is for sure: our days are never dull!  I think it will give you some insight into me, my objective as a SAHM (other than survival!), and may just convince you to follow me.

I promised I would try to accomplish a shower everyday, given I'm pretty new to this SAHM thing, so I was showered, dressed, and fed before either of the princesses woke up around 8.  I used the couple of hours to check over our grocery list and organize some things for next week's vacation. 


MouserciseTime for breakfast.  Here's how breakfast rolls out in my house.  When I'm making my grocery list, I plan for 3 breakfasts.  I figure if I'm making a casserole, pancakes, or waffles there will be leftovers for other days of the week.  My family's opinions are always welcome because if there's no "buy in", then I'm not buyin'.  There is nothing worse than fixing breakfast (even if it's cereal) only for it to be wasted.  Not to foget the budget!

I will usually play some children's music while they eat and let them dance around while I'm cleaning up the kitchen.  Today we Mousercised, which was a blast! 

Time to play school.  There are several educators in my family and sometimes I think I missed my calling.  I think it's very important to have some structure and education worked into your daily routine.  I have invested in several curriculum books (which I cross reference when planning) and a couple of kid science experiment books.  I also love to scrapbook, so my art supplies would put many businesses to shame.    Not that I plan our entire day, I also believe that you have to have FUN as much as possible.  Life it too short.   In fact, most of the educational activities I do with my kids are hands-on, interactive, and FUN! 
Every Sunday I sit down with my curriculum books and plan out the week.  I focus on three "subjects":  Science, Our World, Art, and Reading.  I try to come up with 3-4 activities per day, per subject.  So, we are doing 12-16 different activities each day.   That seems like a lot, but most activities only last about 5 minutes.   My children are young and still have very short attention spans, so it's important not to lose your child's engagement in learning my making anything to long....(insert personal flashback here).  I also try to incoporate special occasions, holidays, etc.  For example celebrating "National Pancake Week" by making different kinds of pancakes all week!  Or National Picnic Day, by talking about all things picnic (bugs, baskets, food, etc.) and then having a picnic! 
This week our focus is on Father's Day, Butterflies, Bedtime, and Colors. 
Just My Dad & Me (Trophy Picture Books)Father's Day.  I always like to "play" teacher with my little ones because it gets them interested in what we are doing.  If they think it's all a game, they are more in-tune with what's going on.  We started today talking about Daddy; his characteristics, what he likes to do, eat, what kind of car he drives, his job, etc.  Then I helped them start a Dad Book.  We will talk about Dad each day and they will complete a total of 5 pages in their books, which will become a gift to Dad on Sunday.  I also picked up some books about dad from our local library, like: My Dad is Awesome (My Relative Series), When Daddy Came to School, and Just My Dad & Me.  We're going to dress up in Daddy's shirts and ties (shhh...he'll never know!)  And, we're also learning a song.

Butterflies.  To be fair, we are starting the week reading Very Hungry Caterpillar, watching the movie, and making the cutest paper caterpillar puppets.  Our snack today consisted of some of the things the very hungry caterpillar feasted on in the book.  We will also make paper butterflies, watch a movie on the metamorphosis, and do some coloring sheets that I found (free) on-line.  I ordered some caterpillars and they are to be delivered this week, so we will actually be watching the metamophosis first hand!
How Do Dinosaurs Say Goodnight?Bedtime.  We have several books on bedtime and we actually did today's lesson on bedtime while the girls were snuggled up for quiet time.  (Yes, my oldest child is 6, but her brain needs to decompress just like the rest of ours!)  We read a couple of the books, talked about night and day and what we did to get ready for bed.  We will be doing play-doh stars, talking about dreams, animals that live at night, and looking at constellations (made with t.p. rolls and black construction paper w/ pin holes in it).  Friday we are going to have a pajama day!

Art.  The girls started making color wheels today.  We did red, blue and yellow.  Since there are 4 years between my children, I have to find ways to challenge the oldest while still keeping my youngest engaged.   The color wheel worked great!  My little one was able to learn colors while my older daughter and I talked about whether the color was "warm" or "cool".  We will add the other colors to the wheel, talk about things these colors, do some science when mixing colors (white) and have a snack that will mix yellow & blue to make green.  Yummy!


Today we ran errands between Butterflies and Bedtime and had a snack before Art.  We even managed to build some forts in the living room, do a little potty training, visit the girl's old daycare (they wanted to see their friends), do a load of laundry, make a birthday present, eat lunch, and have dinner ready when my husband got home!  We had a little family game time, the girls got baths and are settling in for the night.  Today ROCKED!


Saturday, June 12, 2010

Fourth of July Fun

One great thing about a holiday is that you already have a theme.  I love themes!  Themes give you color, food ideas, games and more! And, for the Fourth of July, you are about to set off some ROCKSTAR fireworks of your own!  Grab your potato salad, fire up the grill, and light the pyrotechnics, it's time for the best birthday party of the year!

We generally head down to my in-law's lake house for the fourth of July. The lake Association puts on a decent fireworks display and we can watch them from around the campfire.    We have several toddler's and some elementary children, so there needs to be a range of fun.  Also, we are down there for the weekend, so I like to have several activities.  Here are some of the ideas I have for Fourth of July fun. 

1.  Talk About It.  Don't forget the "reason for the season".  You've heard this before, don't miss an opportunity to educate your child.  There are so many wonderful resources geared toward children.  We picked these books from our local library:  Corouroy's 4th of July, Fourth of July Sparkly Sky, and Hats Off for the Fourth of July.   I'm planning on reading a book a day over the weekend, so we can remember why we are all gathered together.  Certainly, you can get a bit more educational, depending on the age of the children.  I there are a ton of word searches and puzzles available on-line.
Hats off for the Fourth of July (Christian Mother Goose)

2. Make a Craft.   There are several crafts available through Oriental Trading Company, and they are very inexpensive.  I found visors and puff star stickers for under $1/each.  This is perfect for all ages.  The kids get to wear them the rest of the summer and they block harmful UVA/UVB rays.     I also found make-your-own flag magnets are Jo Ann Etc. for 2/$1.  Kids love crafts, so why not incorporate it into your party?  The key is to have enough available so they don't get bored, while still giving them free time to play in the sand box, teeter totter, play cornhole, fish, kayak, go to the pool and swing.  

3. Have a Parade.  Have the children decorate their bikes, scooters, wagons, etc. with streamers, noise makers, flags, etc. and have a parade for all the parents.  Paper streamers are very inexpensive and don't forget about those "old-fashioned" paper-chains we used to make in grade school! 

4. Play Extreme Hula.  This is my favorite.  Get some red, white and blue helium-filled balloons from your local party store.  Get a hula hoop (players can share one or you can have one for each person playing, whatever is available).   Write different "point" denominations on each balloon (i.e.  5, 10, 15, 25...).  Stagger the balloons in the yard close enough that the hula can reach it, but spread out enough that you won't ring two balloons at once.  Each person takes a turn and tries to ring the balloon with their hula hoop.  Have someone keep score.   Now, you can vary this by either having every one throw a certain number of times, or set a timer and let people throw as many times at they want within a given time period.  It depends on the age of your players.

5.  Sing Songs.  Teach a patriotic song like: Yankee Doodle, The Star Spangled Banner, Grand Old Flag, etc.  You can also play these songs and let the children dance around.

There are so many other ways to incorporate Independence Day into your child's routine.  Use patriotic coloring pages at crayon time.  Use only red, white, and blue play-doh for the week.  Have them wear red, white or blue.  Make red, white and blue snacks or meals.   While you're incorporating these things, talk to your child about patriotism, the USA, and the Fourth of July.

And, please, don't forget that any party needs really ROCKIN' food!  I am always very flattered when one of my family members requests a dish that I make.  Especially when they tell me that they've tried to make it, but it "just doesn't taste as good."   Encore! Encore!  However, I get a bit bored making the same things.  We all have a favorite song, but every once in a while we have to change the station.

The Fourth of July is one of those times where you can have all the favorites (baked beans, potato salad, pasta salad, watermelon...), but put your own spin on it to really ROCK.  Here are a few recipes and serving ideas that will ROCK your Independence Day.  If you are having a carry-in, challenge your guests to only bring red, white and blue dishes! 

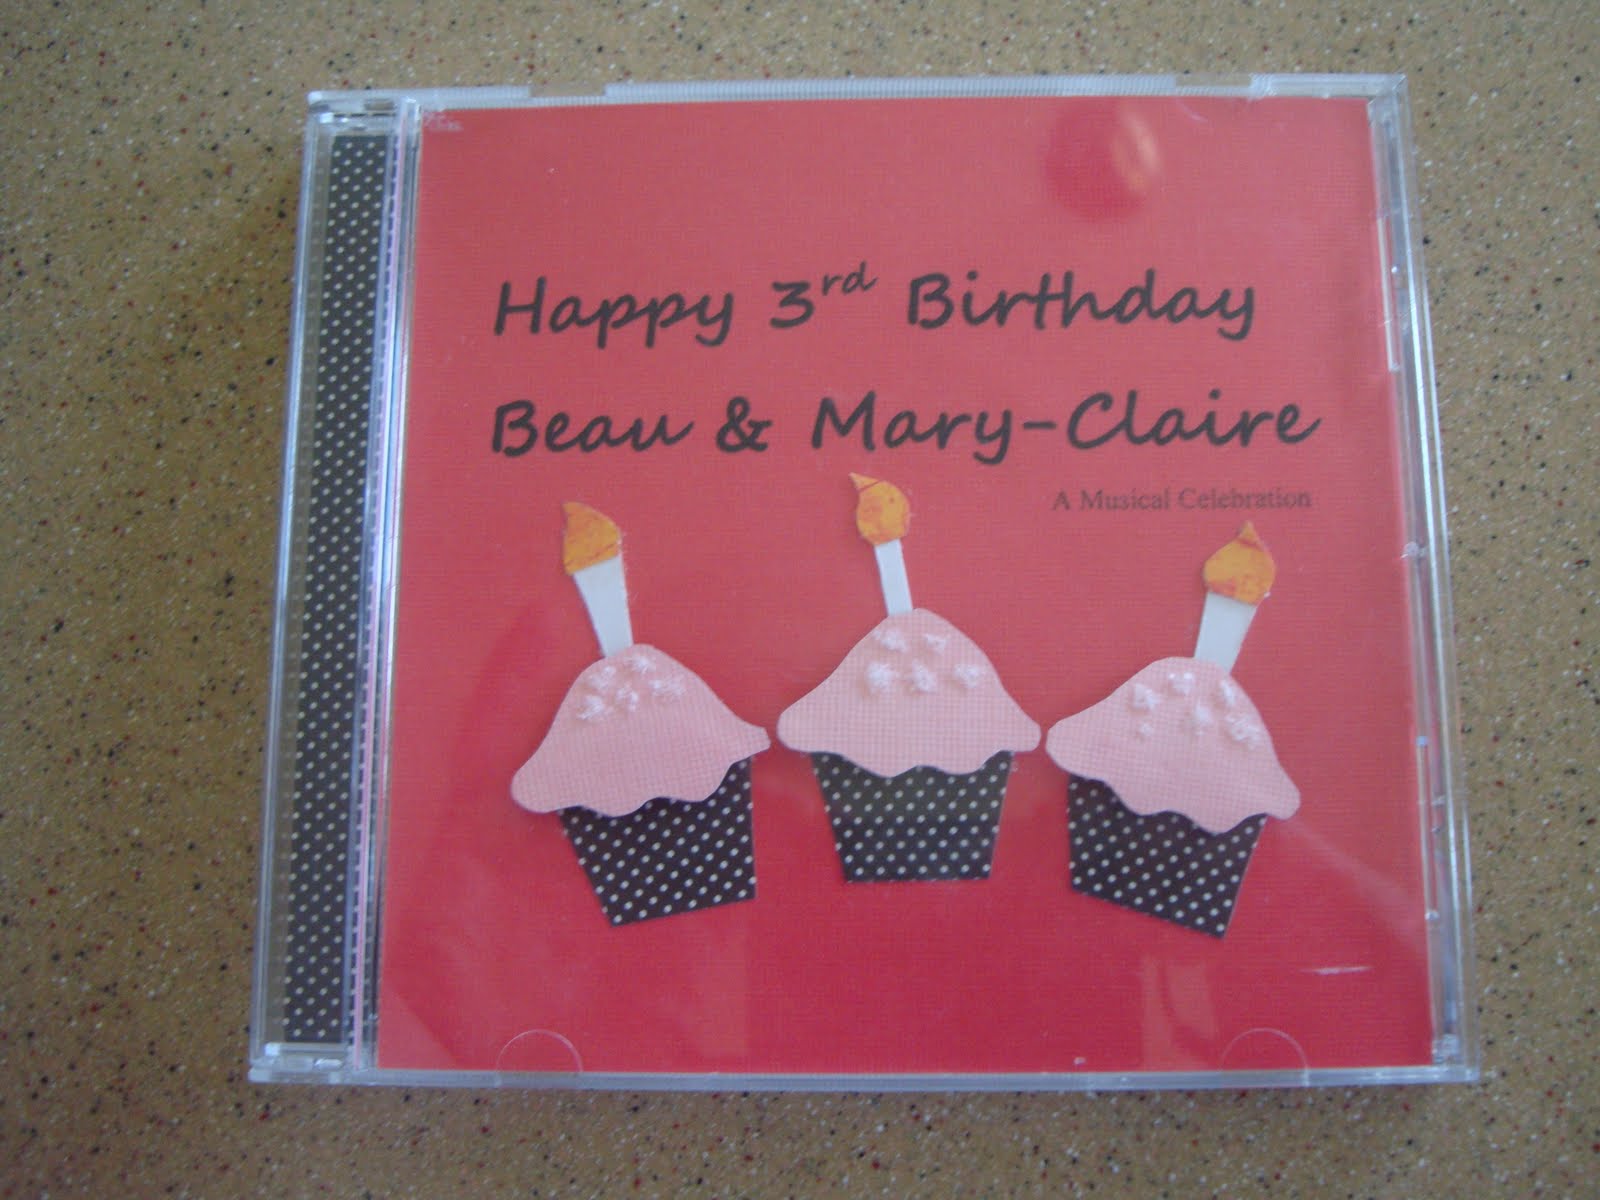
CELEBRATION CUPCAKES  (My own recipe! Enjoy!)

Description:  white cupcakes with strawberry filling, butter cream icing, with a sugared, blueberry star on top.  Sound yummy?  Here's how you do it:

You will need:

White Cake Mix 
Large Instant White Chocolate Pudding
Strawberry Pie Filling
Filling Pastry Tip
Pastry Bag

Buttercream Icing (I follow the Wilton recipe)

1/2 cup solid vegetable shortening
1/2 cup (1 stick) butter or margarine softened
1 teaspoon clear vanilla extract
4 cups sifted confectioners' sugar (approximately 1 lb.)
2 tablespoons milk

Makes: About 3 cups of icing

THE CUPCAKE

Use a white cake mix, add a package of vanilla pudding.
    Bake cupcakes according to package directions.
    I always set my timer for 15 minutes and watch. 

**Remember that cupcakes will continue to bake a bit after they are removed from the oven; however, if they aren't cooked enough, they will sink in the middle!**

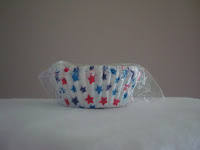
I found these star-studded cupcake liners at Jo Ann's for $1/ 50 count. 

Double up on your liners, so the color stays vibrant.

After the cupcakes are thoroughly cooled, it's time to fill them.
     Fit your pastry bag with the Wilton 230 Filling Tip.
     Fill the pastry bag with Strawberry Pie Filling.
     Insert the tip directly into the center of the cake and apply slow pressure, filling the cupcakes.
     - I usually do a 3 second count.

Mix your icing, and frost your cupcakes, as desired.  I like to pipe my icings on.

Place your iced cupcakes in an air tight container and store them in the fridge while you make the cookie toppers.

COOKIE TOPPER

You will need:

Your favorite cut-out cookie recipe  (mine follows)
Small Star Cookie Cutter
Blueberries
White or Blue sugar sprinkles

This cut-out cookie recipe has been in my family for years.  So long, the index card is yellow and has remnants of cookies past.  You know it's good!

1 C       butter, softened
1 1/2 C confectioner's sugar
1           egg
1 tsp     vanilla
1/4 tsp  almond extract   (if you don't like almond, substitute vanilla)
2 3/4 C flour
1 tsp     baking powder
1/4 tsp  salt

Cream the butter, sugar, egg and vanilla together  until smooth. 
Add remaining ingredients. 
Chill, in air tight container, for 1 hour

Use confectioner's sugar to flour your working space.
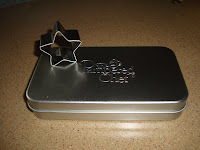
Roll chilled dough to 1/4 inch thickness and cut out your star shaped cookies.  I used the star from my Pampered Chef Creative Cutters set.

Place your blueberry in the center, pushing down gently, and sprinkle with sugar.

Bake, ungreased cookie sheet, 350 degrees, 8-10 minutes.

Cool thoroughly.

To finish, just stick the two lower points of the star into the frosted cupcake.  Assemble cookies just before serving because the buttercream will soften the cookie.

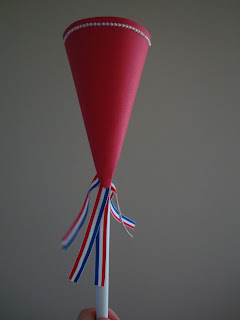
I am also serving up good ol' fashioned caramel corn, but I'm putting a ROCKSTAR twist on it by serving it up in paper cones that are sized just right for little hands!

CARAMEL CORN  (on behalf of Karo)

Cooking Spray

4 quarts popped popcorn
1 cup brown sugar
1/2 cup Karo® Light OR Dark Corn Syrup
1/2 cup (1 stick) butter OR margarine
1/2 teaspoon salt
1/2 teaspoon baking soda
1 teaspoon Spice Islands® Pure Vanilla Extract

Spray a large shallow roasting pan with cooking spray. Add popcorn and place in preheated 250°F oven while preparing caramel.

Mix brown sugar, corn syrup, butter and salt in a heavy 2-quart saucepan. Stirring constantly, bring to a boil over medium heat.

Boil 5 minutes WITHOUT STIRRING. Remove from heat. Stir in baking soda and vanilla.

Pour syrup mixture over warm popcorn, stirring to coat evenly.

Bake for 45 minutes, stirring occasionally. Remove from oven and spread on foil that has been sprayed with cooking spray.
Cool; break apart. Store in tightly covered container.

PAPER CONES
Heavy Card Stock
Scissors
Double sided tape
Other embellishments, if desired

I located the template for the cone on the Internet.  Just google "Paper Cone Template".  I previewed the templates by searching "Images" and clicking on the picture of the template that met my needs.

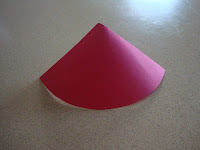
Start by tracing the template and cutting out your cone.  I shaped mine in my hand before adding any adhesive, so I could see how it would line up.

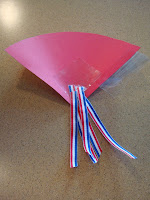
I added ribbon to the inside of mine, so it would hang out the hole in the bottom of the cone.

Apply your double sided tape to the side of the cone that will end up on the inside of your cone.

Wrap the cone and press the tape down securely.

Add a second piece of double sided tape to secure the edge of the cone that ended up on the outside (so it doesn't stick up).

Add any additional embellishments to the outside. 

Fill your cones and enjoy!   Here's my finished project.  Display them in a deep container or punch two holes on opposite sides of your cone, string a ribbon through the holes, and hang them for display as well.


Here are a few more recipes you might like to try for your Independence Day party.


PATRIOTIC PASTA SALAD

STAINED GLASS JELLO   (the Food Librarian used purple and yellow, but use red and blue for the 4th!)

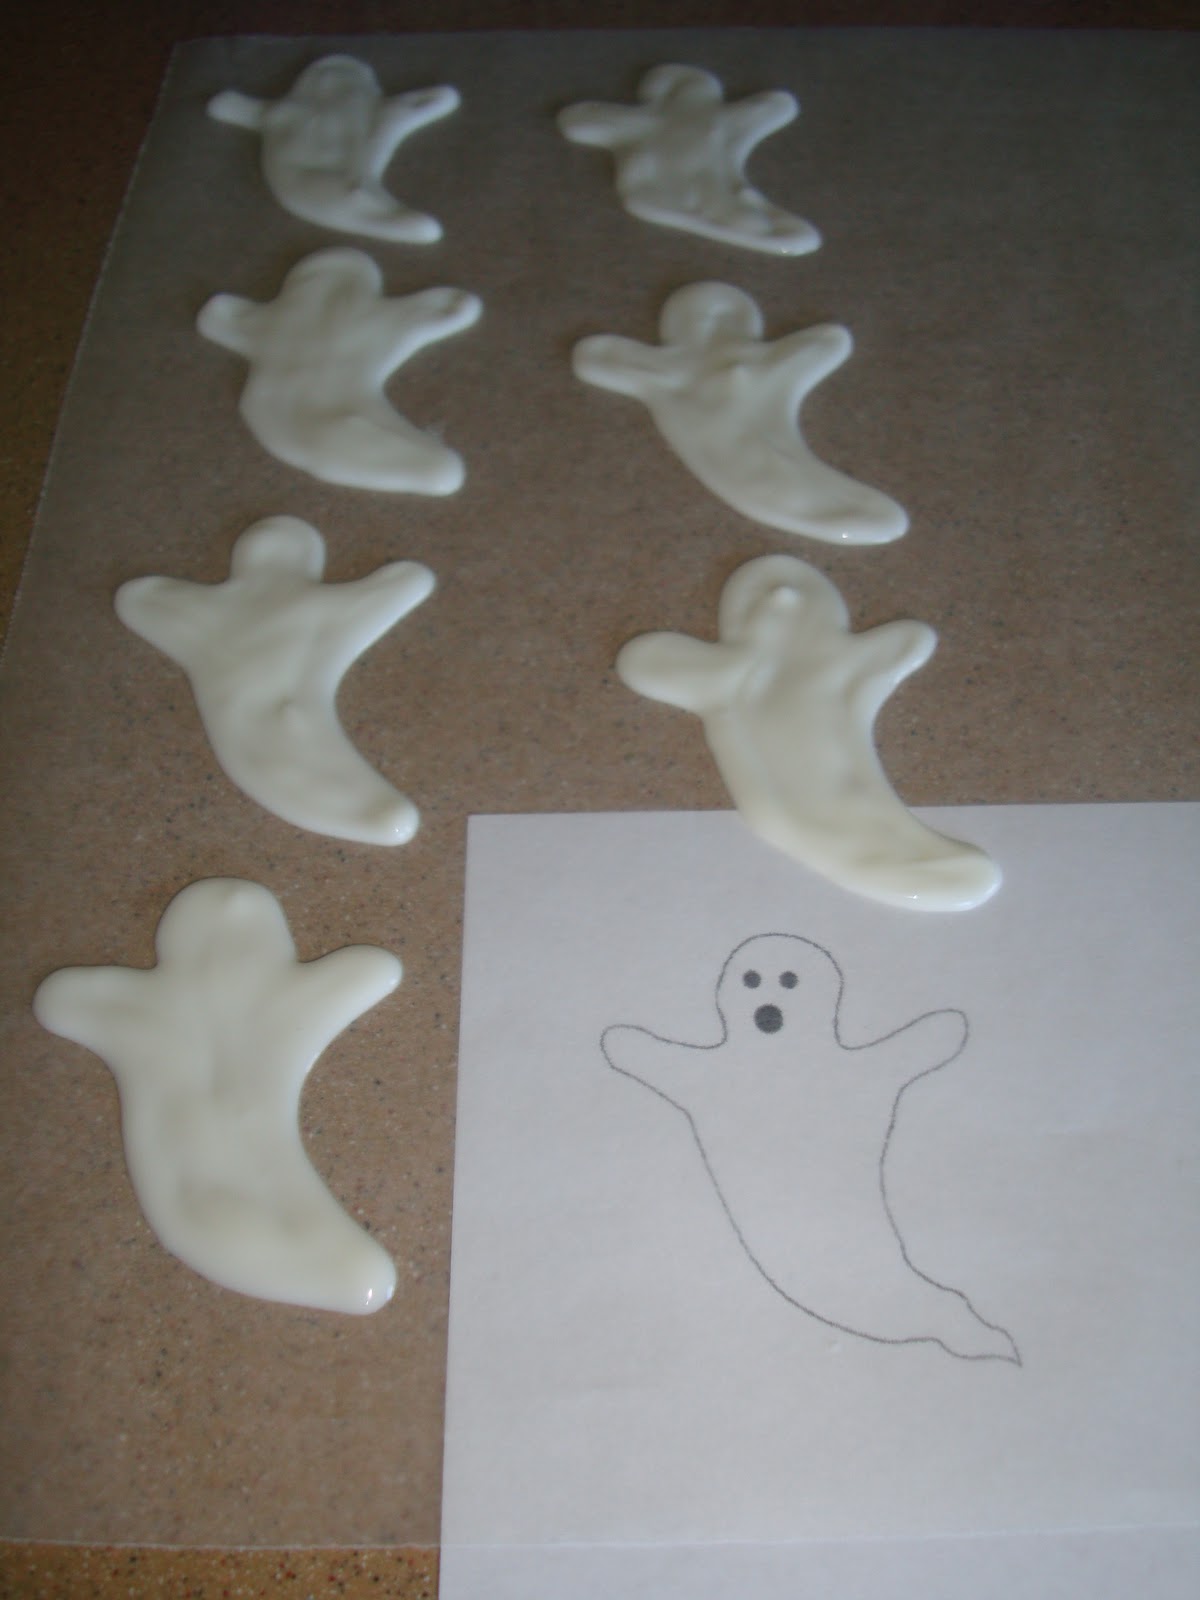
PRETZEL SPARKLERS  (use white chocolate and red and blue sprinkles)

Color tint milk, use strawberries and blueberries on top of ice cream, make blueberry pancakes and have strawberry syrup and whipped cream, make sugar cookies and sprinkle them with red and blue.  (Make them all star shaped for a really great display!) 

I HOPE YOUR FOURTH OF JULY ROCKS!!